
Why Changing Out an Expansion Tank Is a Smart Weekend Fix
Changing out an expansion tank is a straightforward DIY job most homeowners can finish in under an hour — no special plumbing license required.
Here’s the fast version of how to do it:
- Shut off the cold water supply to your water heater
- Turn off power or set gas to “Pilot”
- Open a hot water faucet to relieve pressure
- Unscrew the old tank (have a bucket ready — it may be heavy)
- Pre-charge the new tank to match your home’s water pressure
- Wrap the threads with Teflon tape and screw on the new tank
- Restore water and power, then check for leaks
Most expansion tanks last 5 to 10 years. When they fail, your pressure relief valve starts leaking and your pipes take the hit. Replacing the tank before that happens protects your whole plumbing system.
In Florida’s closed plumbing systems — common across Pasco, Pinellas, and Hillsborough counties — a working expansion tank isn’t optional. Without one, thermal expansion pressure has nowhere to go, and that stress quietly damages fixtures, joints, and your water heater every single day.
I’m Joey Denick, and with over 20 years of hands-on plumbing experience, I’ve replaced more expansion tanks than I can count — and changing out an expansion tank is one of the most impactful maintenance tasks a homeowner can do themselves. Let me walk you through exactly how to get it done right.

Understanding thermal expansion and your plumbing
To understand why changing out an expansion tank is so important, we have to look at a basic law of physics: water expands when it gets hot. When the water inside your heater warms up, it grows in volume by about 5% to 8%. In the old days, this extra water would just push back into the city’s main water line. However, modern plumbing codes in areas like St. Petersburg and Tampa now require “closed-loop” systems.
A closed-loop system uses check valves or backflow preventers to keep your home’s water from flowing back into the municipal supply. This is great for water purity, but it creates a problem: that expanding hot water has nowhere to go. Without a buffer, the pressure inside your pipes can spike to dangerous levels, potentially cracking your water heater or causing joints to fail.

This is where the expansion tank comes in. It’s a small metal vessel, usually holding about two gallons, that acts as a pressure buffer. Inside, a flexible rubber diaphragm separates a pocket of pressurized air from the water. As water expands, it pushes against that diaphragm, compressing the air and absorbing the “shock” of the extra volume.
Think of it like a shock absorber for your plumbing. If that diaphragm ruptures or the air pocket leaks out, the tank becomes “waterlogged.” At that point, it’s just a heavy piece of metal doing nothing to protect your home, which is when changing out an expansion tank becomes a priority.
Signs it is time for a replacement
How do you know if your tank is actually dead? You don’t want to go through the trouble of changing out an expansion tank if the one you have is still kicking. Here are the red flags we look for:
- The Leaking T&P Valve: The Temperature and Pressure (T&P) relief valve on the side of your water heater is designed to drip if the pressure gets too high. If you see water pooling under that discharge pipe, it often means your expansion tank isn’t doing its job. You can learn more about this in our guide on water heater leaks what you need to know.
- The “Knock” Test: Give the tank a gentle rap with your knuckles or a screwdriver handle. The top half (where the water is) should sound like a dull “thud,” but the bottom half (where the air should be) should sound like a hollow “tink.” If the whole thing sounds solid, it’s full of water and needs to go.
- The Schrader Valve Test: At the very bottom of the tank, there is a small air valve just like the one on a car tire. Depress the pin briefly. If air comes out, the bladder might still be okay. If water squirts out, the internal diaphragm is ruptured, and you definitely need to replace it.
- Visible Rust or Corrosion: If you see “weeping” at the threads or rust spots on the tank body, it’s a ticking time bomb.
Before you start, it is a great idea to check your actual house water pressure. We recommend using a tool like the Rainbird P2A water test gauge. Most homes in Pinellas or Hillsborough County should sit between 50 and 75 PSI. If your pressure is higher than 80 PSI, your expansion tank will fail much faster, and you might need a pressure-reducing valve (PRV) too.
Step-by-step guide to changing out an expansion tank
Ready to dive in? Changing out an expansion tank is mostly about preparation. If you follow these steps, you’ll avoid a “Old Faithful” moment in your garage or utility closet.
- Safety First: Turn off the power to your electric water heater at the breaker. If you have a gas heater, turn the dial to the “Pilot” setting. This prevents the heating elements from burning out while the tank is partially empty.
- Depressurize the System: Close the cold water shut-off valve leading into the water heater. Then, go to the nearest sink and turn on the hot water. Let it run until the flow stops. This relieves the pressure so you don’t get sprayed when you unscrew the tank.
- Drain a Little Water: You don’t need to drain the whole heater, but draining a gallon or two from the bottom drain valve helps prevent a mess. If you’re dealing with a broken water heater that’s already leaking, be extra careful here.
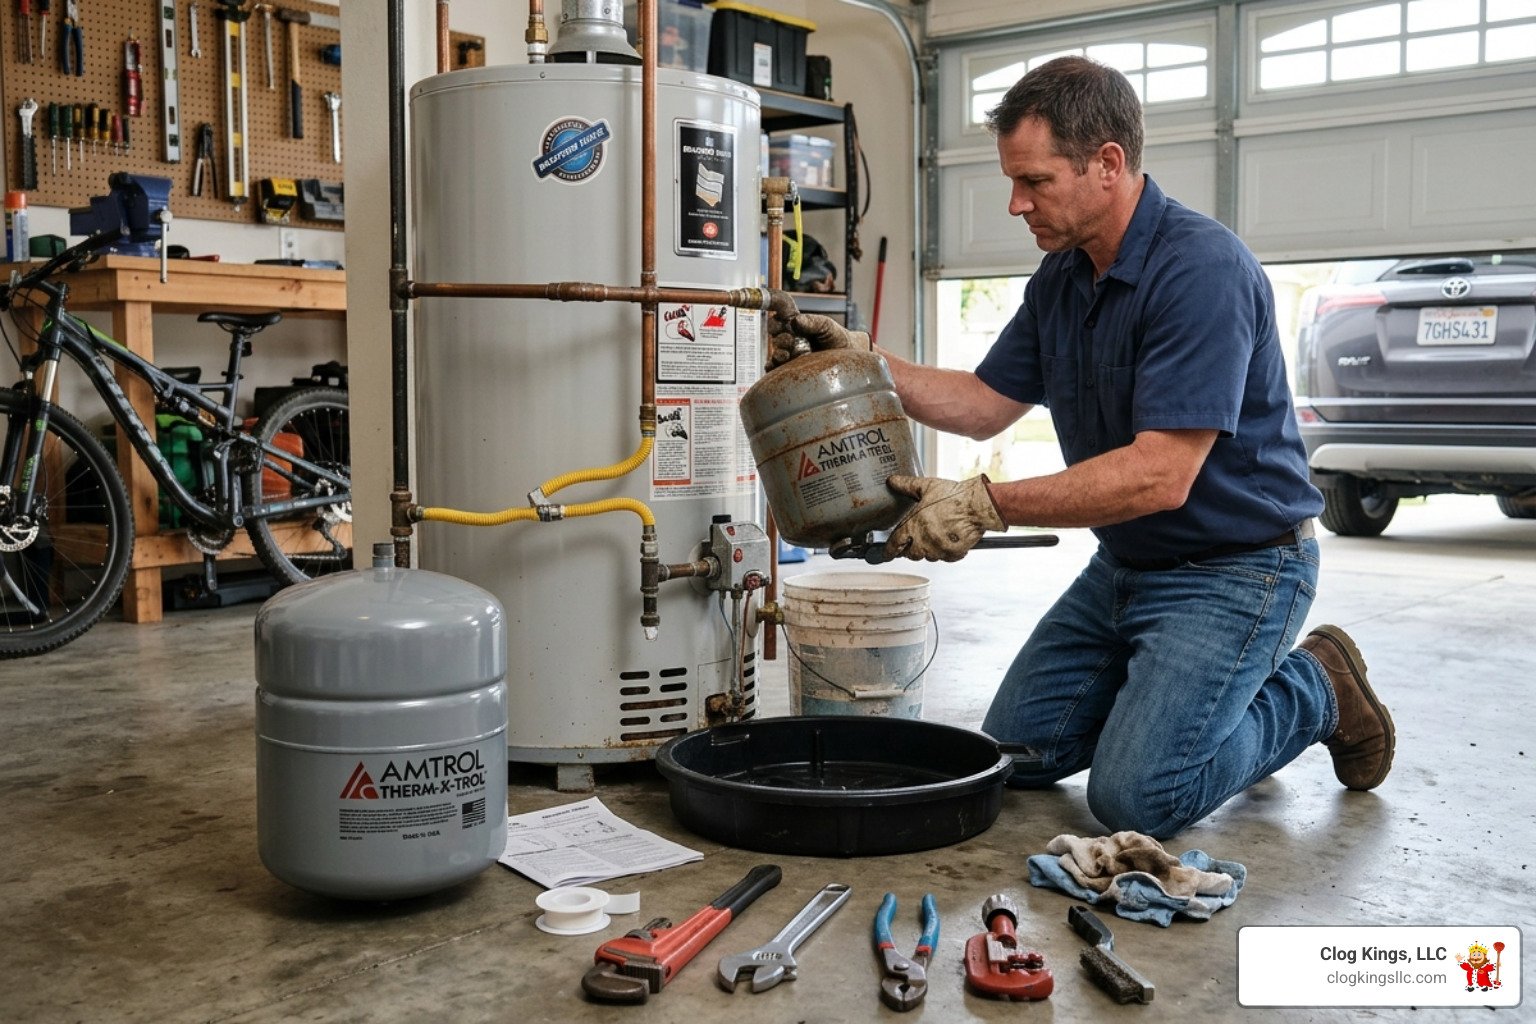
- Remove the Old Tank: Place a bucket underneath the tank. Use a pipe wrench to grip the plumbing and an adjustable wrench to turn the tank counter-clockwise. Warning: If the tank is failed and full of water, it will be heavy — up to 35 pounds or more. Don’t let it drop on your toes!
- Pre-charge the New Tank: This is the most common DIY mistake. New tanks like the Amtrol ST-5 expansion tank come pre-charged to about 20 or 40 PSI. You must use a bike pump or compressor to match this to your home’s static water pressure (the number you found with your gauge earlier).
- Seal the Threads: Apply Teflon tape to the male threads of the new tank. Wrap it clockwise (the same direction you’ll be screwing it on) about 3-4 times. I like to leave the first two threads bare to ensure the tape doesn’t get into the water line. For a “pro” seal, add a little pipe dope over the tape.
- Installation: Screw the new tank on by hand until it’s snug, then give it an extra quarter-turn with the wrench. Do not overtighten!
- Restore and Check: Turn the cold water back on slowly. Keep that hot water faucet open at the sink until the air stops sputtering and you have a steady stream. Check your new connections for any drips. Finally, turn the power or gas back on.
Tools needed for changing out an expansion tank
You don’t need a truck full of gear for this, but having the right tools makes changing out an expansion tank much smoother:
- Pipe Wrench & Adjustable Wrench: One to hold the pipe steady, one to turn the tank.
- Tire Pressure Gauge: To check the tank’s pre-charge.
- Bicycle Pump or Air Compressor: To adjust the tank’s PSI.
- Bucket: To catch the “leftover” water in the old tank.
- Thread Sealant: Teflon tape and/or pipe dope.
- Water Pressure Gauge: To measure your home’s incoming pressure.
Common mistakes when changing out an expansion tank
We’ve seen it all in the field, and most “DIY fails” come down to these three things:
- Ignoring the Pre-charge: If your home pressure is 60 PSI and your tank is only set to 20 PSI, the diaphragm is already stretched to its limit before the water even gets hot. This leads to premature failure.
- Overtightening: You aren’t trying to fuse the metals together. Snug plus a tiny bit more is all you need. Overtightening can crack the fittings or damage the seal.
- Lack of Support: An expansion tank full of water is heavy. If your tank is hanging off a flimsy piece of PEX or copper pipe without a support bracket, the weight can eventually snap the pipe. Always use a support strap if the tank isn’t resting directly on a solid nipple.
Sizing and cost considerations
When you’re at the hardware store, you’ll likely see two main sizes. Getting the right one is crucial for protecting your system.
| Water Heater Size | Recommended Expansion Tank | Expansion Volume (Approx) |
|---|---|---|
| Up to 50 Gallons | 2.0 – 2.1 Gallon Tank | 1.5 Gallons |
| 60 to 80 Gallons | 4.4 – 4.8 Gallon Tank | 3.2 Gallons |
| 100+ Gallons | Multiple Tanks or Commercial Size | 5.0+ Gallons |
In terms of cost, changing out an expansion tank yourself is very budget-friendly. A standard 2-gallon tank usually runs between $40 and $70. If you decide to go with professional water heater replacements or have a pro install just the tank, labor typically ranges from $100 to $300 depending on how much “re-piping” is needed. Considering a new water heater can cost $1,500 or more, a $50 tank is incredibly cheap insurance.
Frequently Asked Questions about expansion tanks
Should I drain the entire water heater before replacement?
No, you don’t need to drain the whole thing! That’s a waste of time and water. You only need to drain enough to get the water level below the point where the expansion tank connects (which is usually on the top cold-water inlet). Draining about 2-3 gallons is usually plenty to prevent a spill. The “vacuum seal” created by keeping other faucets closed also helps keep the water in the tank while you swap the parts.
How often should I check the air pressure?
We recommend checking the air pressure at least once a year, or even biannually when you flush your water heater. Remember: you must depressurize the water system (turn off water, open faucet) before checking the air pressure with your tire gauge. If you check it while the water is under pressure, you’ll get a false high reading.
Can I install the tank horizontally?
Yes, most modern diaphragm tanks can be installed horizontally, but there’s a catch: you must use a mounting bracket or support straps. A horizontal tank puts a massive amount of leverage and stress on the plumbing joints. Without support, a waterlogged tank can easily snap a copper pipe, leading to a flooded garage.
Professional help for your water heater
While changing out an expansion tank is a great DIY project, we know that not everyone is comfortable “tinkering” with their home’s plumbing. If you find that your pipes are corroded, your shut-off valve is stuck, or you just don’t have the time to spend your Saturday morning under a water heater, we are here to help.
At Clog Kings LLC, we provide 24/7 local service across Pasco, Manatee, Pinellas, and Hillsborough Counties. Whether you’re in a condo in St. Pete or a home in Tampa, our team can swap your tank, check your home’s water pressure, and ensure your system is safe from thermal expansion.
Don’t let a $50 part turn into a $2,000 floor repair. Check that tank today, and if you need a hand, give us a call!